For instruction on folding your Storigami l-shaped sectional cover, please refer to the guide below.
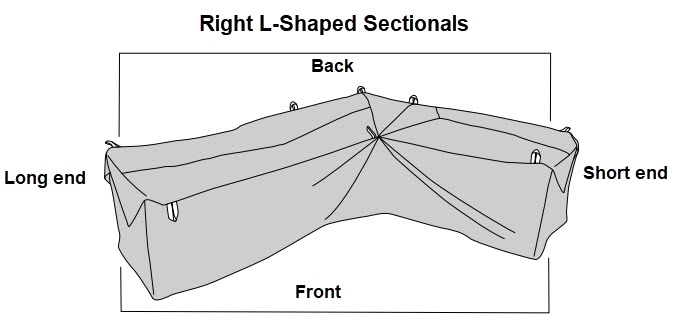
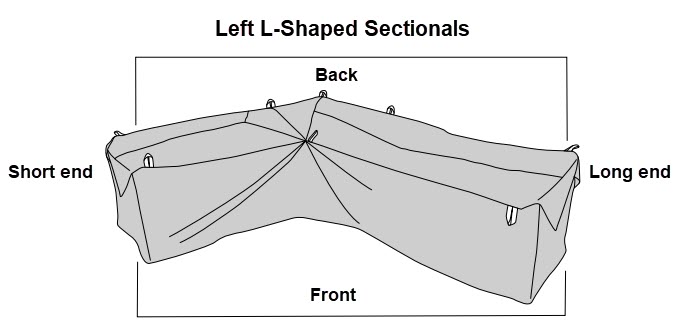
Before proceeding, it is important to understand the orientation of the cover. Please refer to the image below for where the front, back, long end and short end of the cover are.
Please select how you would like to fold your cover:
Folding While Installed on Furniture
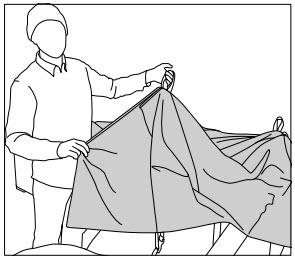
Step 1: Lift cover away from furniture at all corners and lay loosely on top.
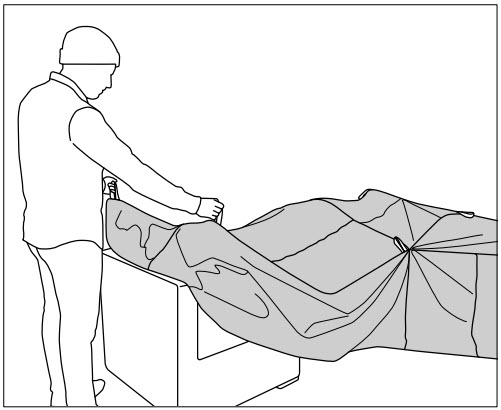
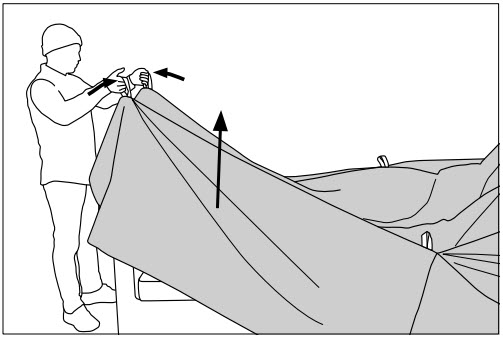
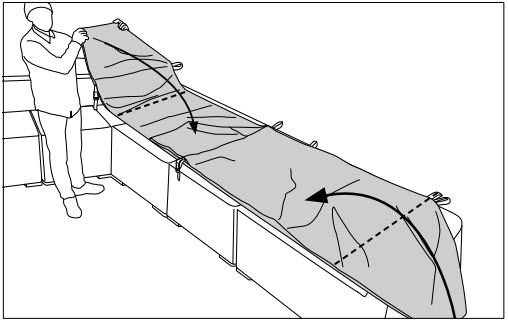
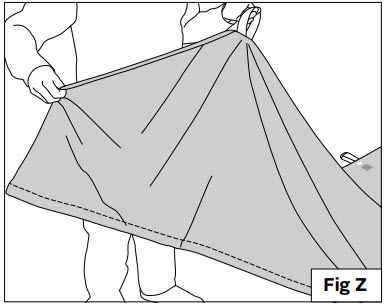
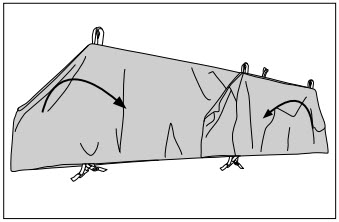
Step 2: Move to the long end of the cover and locate the two handles at the end of your cover near the orange guide arrow labels and grasp one handle in each hand.
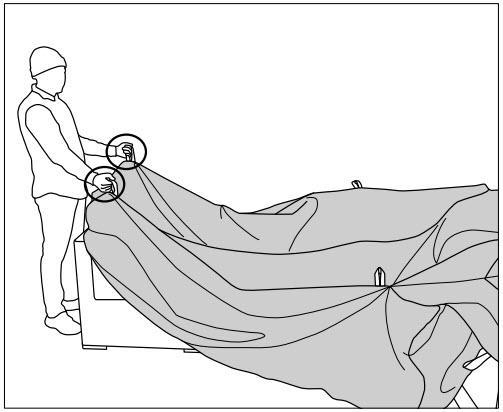
Step 3: Lift the cover, bringing the handles together towards the center and straighten the center fold.
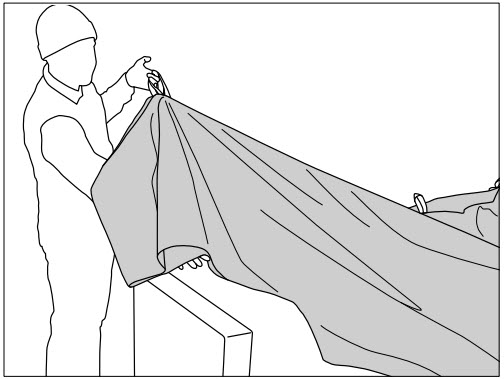
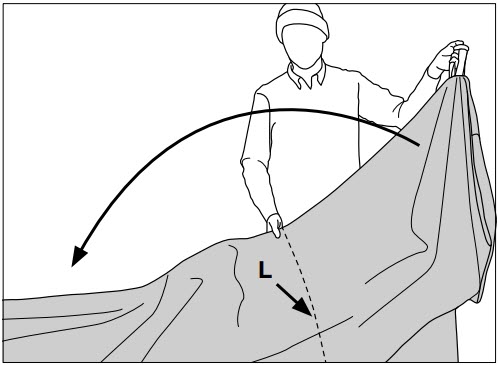
Step 4A: While holding the cover in the lifted position, hold both handles in one hand and straighten out the corner (where the two white stitch lines come together).

Step 4B: Sweep the bottom hem of the cover towards the front of the sectional to lay the cover flat.
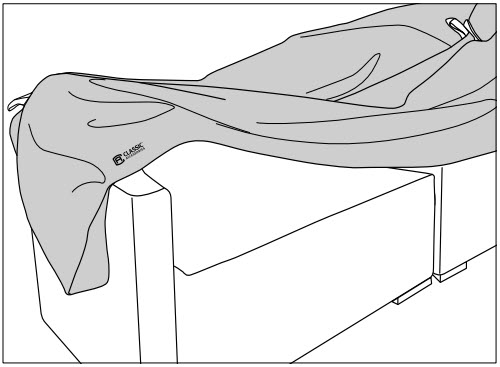
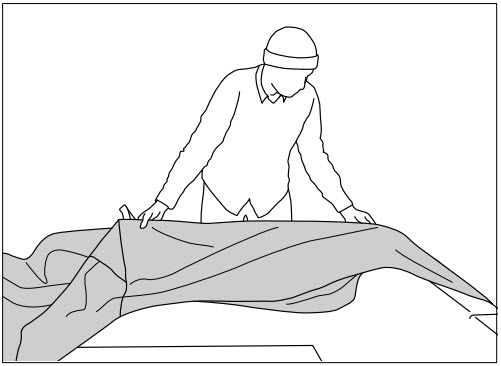
Step 5: Lay the cover flat with the handles the back of the sectional. The Classic Accessories logo will be showing at the front when finished. The long end of the cover should look similar to the illustration when laid flat. Straighten and align the edges.
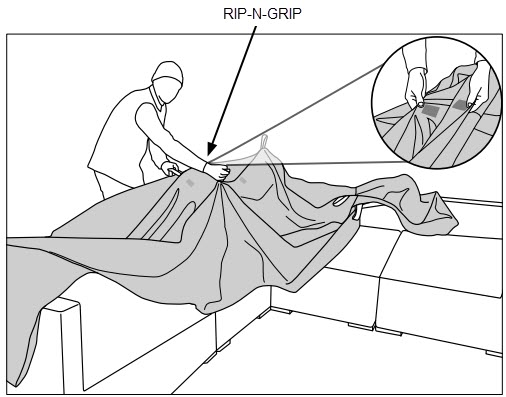
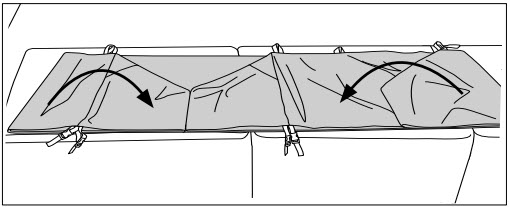
Step 6: Move to the opposite end of the long side and bring the handles together. Then pull the corner out, and connect rip-n-grip strips. Sweep the bottom hem toward the front of the sectional and lay the end flat with the handles hanging toward the back of the sectional.

Step 7: Locate the center pair of handles and the bring rip-n-grip strips together. It is important to ensure that all the handles in this section are paired together and are pulled toward the back with the folded layers lying flat.
Step 8: Move to the remaining end of the cover and locate the two handles at the end of the cover near the orange guide arrow labels and grasp one handle in each hand. Lift and bring the loop handles together, then transfer both handles to one hand. Straighten the center fold. (The same as in step 3 and 4)
Step 9: Walk the remaining end of the cover around to the back corner of the sectional to align with the other side and to form a long rectangle. Straighten and smooth out all layers.

Step 10: Locate the orange stitch line (L). Fold the short end to lay over the long end at the orange stitch line.
Step 11: Straighten and align top, bottom, and interior layers to eliminate bunching.
Step 12: If you prefer, transfer to a flat surface, making sure both top, bottom, and interior layers are laying flat.
Step 13: Fold both ends in toward the center.
Step 14: Continue folding the ends in toward the center to desired length.
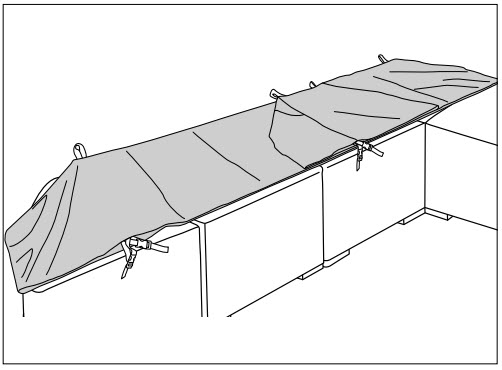
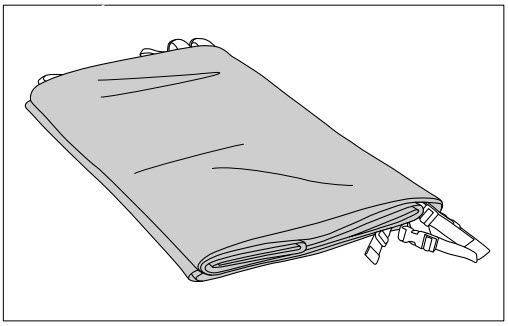
Step 15: This Illustration shows an example of a completely folded cover. (Yours will look different if you choose to fold it more or less times than we did.
Folding While on a Flat Surface
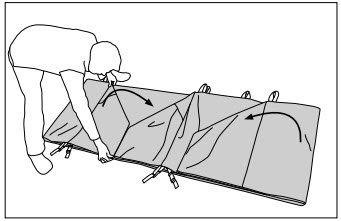
Step 1A: Spread your cover out on the ground or other flat surface. Starting at end (A) end of the cover, grasp one handle in each hand, lift up, and bring the handles together.
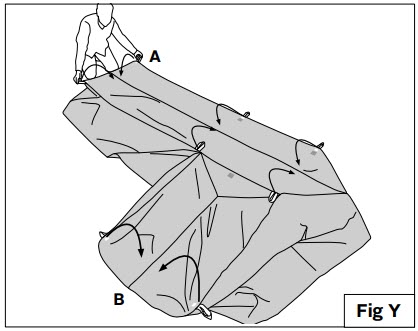
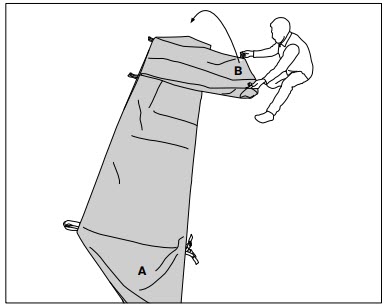
Step 1B: Straighten the center fold. (Fig Z). Lay end back down with handles together and facing toward the back. Smooth and align layers. This will be repeated for all sets of handles starting with (A) and finishing with (B) (Fig. Y).
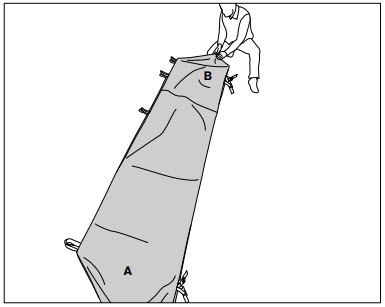
Step 2: Finish with the two handles at the end (B) of the cover and lay flat like the others. Bring end (B) around to extend the top panel to its full length.
Step 3: Connect rip-n-grips together. Ensure all layers are lying flat.
Step 4: Locate the orange stitch line and fold end (B) over end (A) at the orange stitch line.
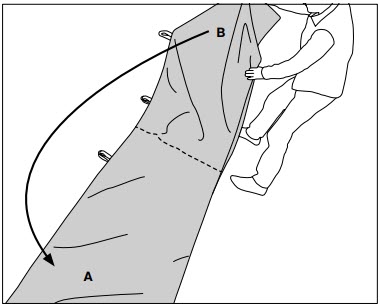
Step 5: Straighten out fabric panels and align all edges. Fold the ends toward the center to create a rectangle.
Step 6: From this point, continuing folding ends in until you reach desired length.
These steps can also be viewed in our instructional video.
Comments
0 comments
Article is closed for comments.